For many years, mobility and flexibility were synonymous terms.
How do you sit lower in a squat? Work on your hip mobility.
Developing anterior knee pain? Get your hamstrings more flexible.
Stretch this, mobilize that. It was largely viewed as the same thing; make whatever it is that is ‘tight’ move better.
Defining ‘mobility’
Let’s start right from the top and get some definitions out there so we can all get on the same page.
Flexibility refers to a passive range of motion surrounding a specific joint articulation. If you reach down and pull your heel in to your backside, you are passively stretching knee flexion. There are minimal active muscle contractions being initiated by your central nervous system through this process. It’s super important (more on that to come), but it will have very minimal carry over to athletic performance.
Mobility refers to the active range of motion that is available to a specific joint. If I take that same passive knee flexion stretch and hold my heel up to my backside and let go, am I able to still keep my heel at the same height? Or does it drop? Using active muscle contractions, how much active knee flexion is available to that knee?
That is the difference between flexibility and mobility.
Why We Need Flexibility
If you thought this article was going to trash flexibility training, you couldn’t be further from the truth. We need flexibility. But the reason why we need flexibility is often misunderstood. Take a closer look at the definitions above. If flexibility is passive range of motion and mobility is our ability to capture that passive range of motion and make it an active range of motion, than flexibility opens up our ability to have more mobility.
So, Where Do I Start?
A really good place to start is with your assessment. I would make sure that your assessment includes both active and passive testing. If you attended the Parisi Speed and Strength Summit last October at Parisi Fair Lawn, then you heard my presentation on assessing the PEAK athlete and got all the goods as to how we integrate both passive and active testing in to our initial assessment. If you didn’t, you’re in luck! Here are the spark notes:
Passive testing is any joint measurement with a goniometer.
Active testing is any movement. Literally, any movement. The Functional Movement Screen (FMS) is a great place to start, but is not limited to that screening procedure.
Pretty easy spark notes, eh?
During the assessment, if any athlete scored a 1 or had an asymmetry of any proportion (3/2, 3/1, 2/1), I would passively measure and compare the involved joints. For example: If I am assessing an athlete who scores a left-2 right-1 on the overhead shoulder mobility FMS test, I would follow that up with passive table measurements of shoulder internal and external rotation measurements.
Let’s take this example even further.
Our athlete with a 2/1 overhead mobility screen was put on the table and was passively measured for shoulder internal and external rotation.
| Left Shoulder (FMS 2) | Right Shoulder (FMS 1) | |
| Internal Rotation | 63 degrees | 54 degrees |
| External Rotation | 124 degrees | 136 degrees |
| Total Range of Motion | 187 degrees | 190 degrees |
This athlete passively demonstrates plenty of flexibility around the shoulder joint. So why did he/she score so poorly on the FMS screen?
Well, assuming there are no red flags, shady injury history, pain responses, or any glaring reason to refer this athlete to a Physical Therapist, this athlete might have a mobility problem. If a Coach just saw the poor active score from the FMS screen, they might be inclined to stretch this athlete’s shoulders to create more range of motion. Clearly, this athlete doesn’t need more flexibility, but does need more mobility.
NOW Where Do I Start?
There are many ‘camps’ when it comes to mobility training. The most important aspect to consider is that athletes that need more mobility to perform better probably have adequate flexibility in a joint and need to increase their motor control.
Insert Controlled Articular Rotations or better known as CARs. Joint articulations have been around for decades, we aren’t bringing anything new to the table here. However, over the last 12 months, Dr. Andrea Spinea, creator of Functional Range and Conditioning, has brought a lot of research in to Strength and Conditioning and Rehabilitation as to why CARs serve such an important role with athletes.
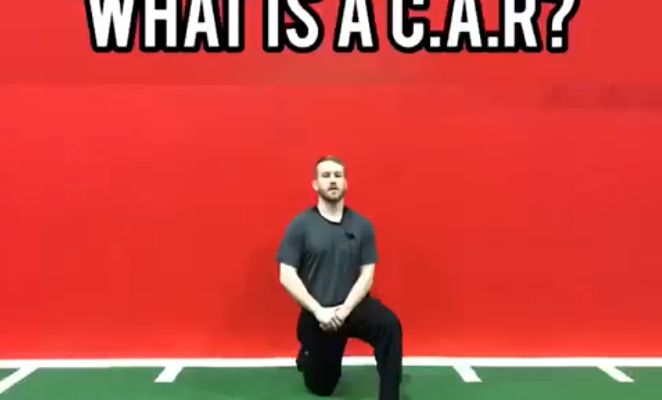
What Is A CAR?
CARs are designed to take a joint articulation through its outermost range of motion. This is extremely beneficial for a number of reasons. What are some of those reasons? I’m glad you asked!
- Sensory feedback to the brain as to where that joint sits in space
- Taking a joint through its FULL range of motion on a more routine basis. Something you may not do.
- If you LACK range of motion, CARs serve as an easy, unloaded, way to introduce your body and central nervous system to these new-found ranges.
- Joint health
- Improved blood flow to the cartilage around the joint structure
For the purposes of our example athlete, the first bullet point really hits home. We need to give our athlete’s central nervous system a little dose of where that limb sits in space as it starts to move.
Programming CARs
There are a few important concepts to consider while programming CARs for an athlete. First, remember that most young athletes with above average range of motion LACK control. CARS need to be done slow and controlled throughout the entirety of the repetition, I often use the analogy of cruise control on a car. In this case, we are setting the cruise control at 3 miles per hour.
Second, this only helps the athlete if the repetition is done through the outermost range of the joint. The slower speed helps keep an athlete there, but as a Coach, this is something you want to be on the lookout for.
Third, because an athlete is working at the outermost range of the joint, at a slow pace, the neural drive to that joint articulation is relatively high. The athlete’s central nervous system isn’t going to be fully effected, but I wouldn’t program heavy, taxing, lifts of the same joint structure while performing CARs.
Fourth, and last point. Exposure wins with young athletes. As Coaches, we want to make sure our athlete’s are doing CARs almost daily. Because they are unloaded, with controllable tempo, we can absolutely program these at different levels.
| Time per repetition (seconds) | Sets x Repetitions | |
| Warm Up | 4-6 seconds | 1 x 1 (per limb) |
| Training Session | 6-10 seconds | 2-4 x 1-3 (per limb) |
| Cool Down | 4-6 seconds | 2 x 2 (per limb) |
**please note these are just suggestions**
An example of how CARs would work in with traditional strength movements…
- Trap Bar Deadlift x 3 x 5 (31X Tempo)
- Push Up x 3 x 10 (31X Tempo)
- Half Kneeling Shoulder CAR x 3 x 2 per arm (8 Seconds per rep)
Half Kneeling Shoulder CAR
About the Author: Casey Lee
Casey Lee, Parisi Speed School Program Director at The Edge in Williston, Vermont, has been with the Parisi Speed School since 2011. He has had one of the fastest tracks of any performance coach, becoming the youngest Master Coach in the Parisi network from 2014-2017. During this time he provided sports performance programming and educational content throughout the entire Parisi network. He also traveled to various Parisi locations through out the country to teach and certify new and existing Performance Coaches in the Parisi sports performance protocols. Casey’s mission is to help others better their physical, mental, and professional wellbeing through fitness and positive interaction.


 Continuous Improvement with Continued Education
[…] Ok, now the good news. I had the pleasure of writing a 3-part blog for the Parisi Speed School, yes, this very blog you are reading right now, covering all things MOBILITY! Give it a read here. […]